Documentation Guide

Learn how to use AssignMe to convert assignments to handwritten documents and create your own handwriting fonts.

Quick Navigation

Assignment to Handwriting

1. Uploading Assignment Files

Begin by navigating to the home page and locate the file upload section.

  1. Click on the "Choose File" button to select your assignment document (PDF or image).
  2. Enter the subject name in the provided field for more accurate processing.
  3. Click the "Upload" button to send your file for processing.
  4. Wait while the system processes your assignment and converts it to text.

Note: Supported file formats include PDF, JPG, PNG, and JPEG. For best results, ensure your assignment questions are clearly visible in the document.

File Upload Interface

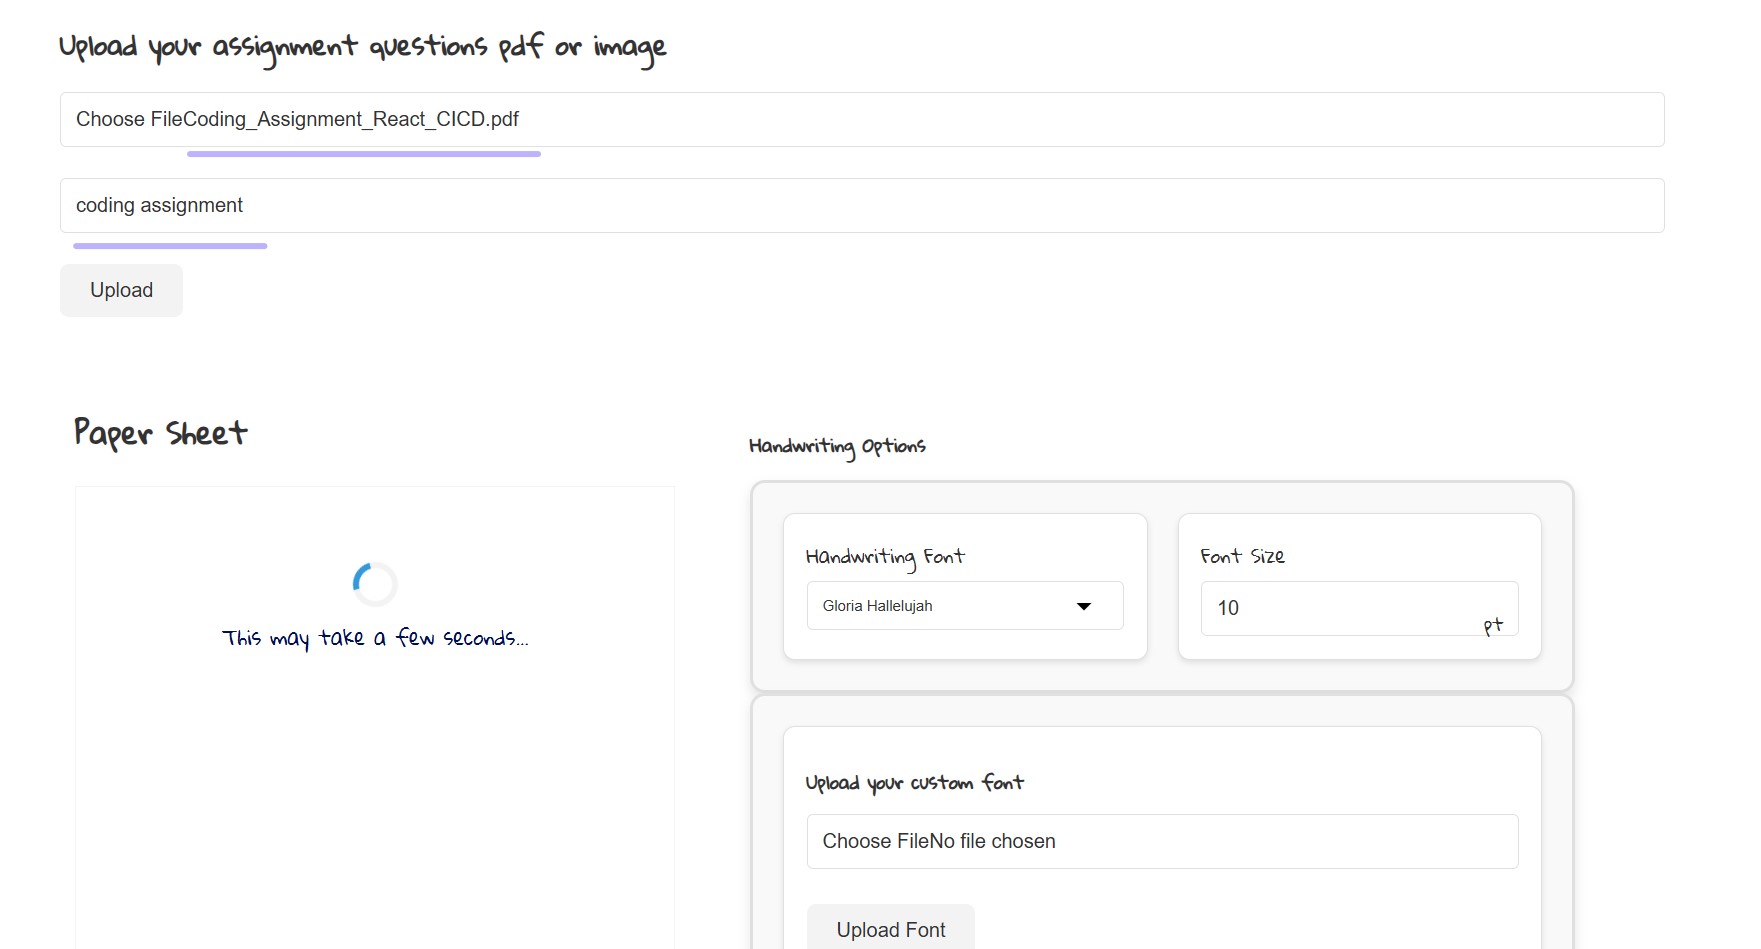
File upload section on the home page

2. Customizing Your Handwriting

After your document is processed, you can customize how your handwritten document will look.

Handwriting Font Options:

  • Font Selection: Choose from over 30 handwriting styles from the dropdown menu.
  • Font Size: Adjust the size of your handwriting (recommended range: 8-15pt).
  • Custom Font: Upload your own font file or use a font created in the "Own Handwriting" section.

Layout Adjustments:

  • Vertical Position: Control where text begins on the page.
  • Word Spacing: Adjust spacing between words (0-100px).
  • Letter Spacing: Control spacing between letters (-5 to 40pt).

Appearance Options:

  • Effects: Choose between Shadows, Scanner, or No Effect.
  • Custom Paper Background: Upload your own paper texture or background image.
  • Pen Color: Select Blue, Black, Red, or Green ink.
Handwriting Customization Panel

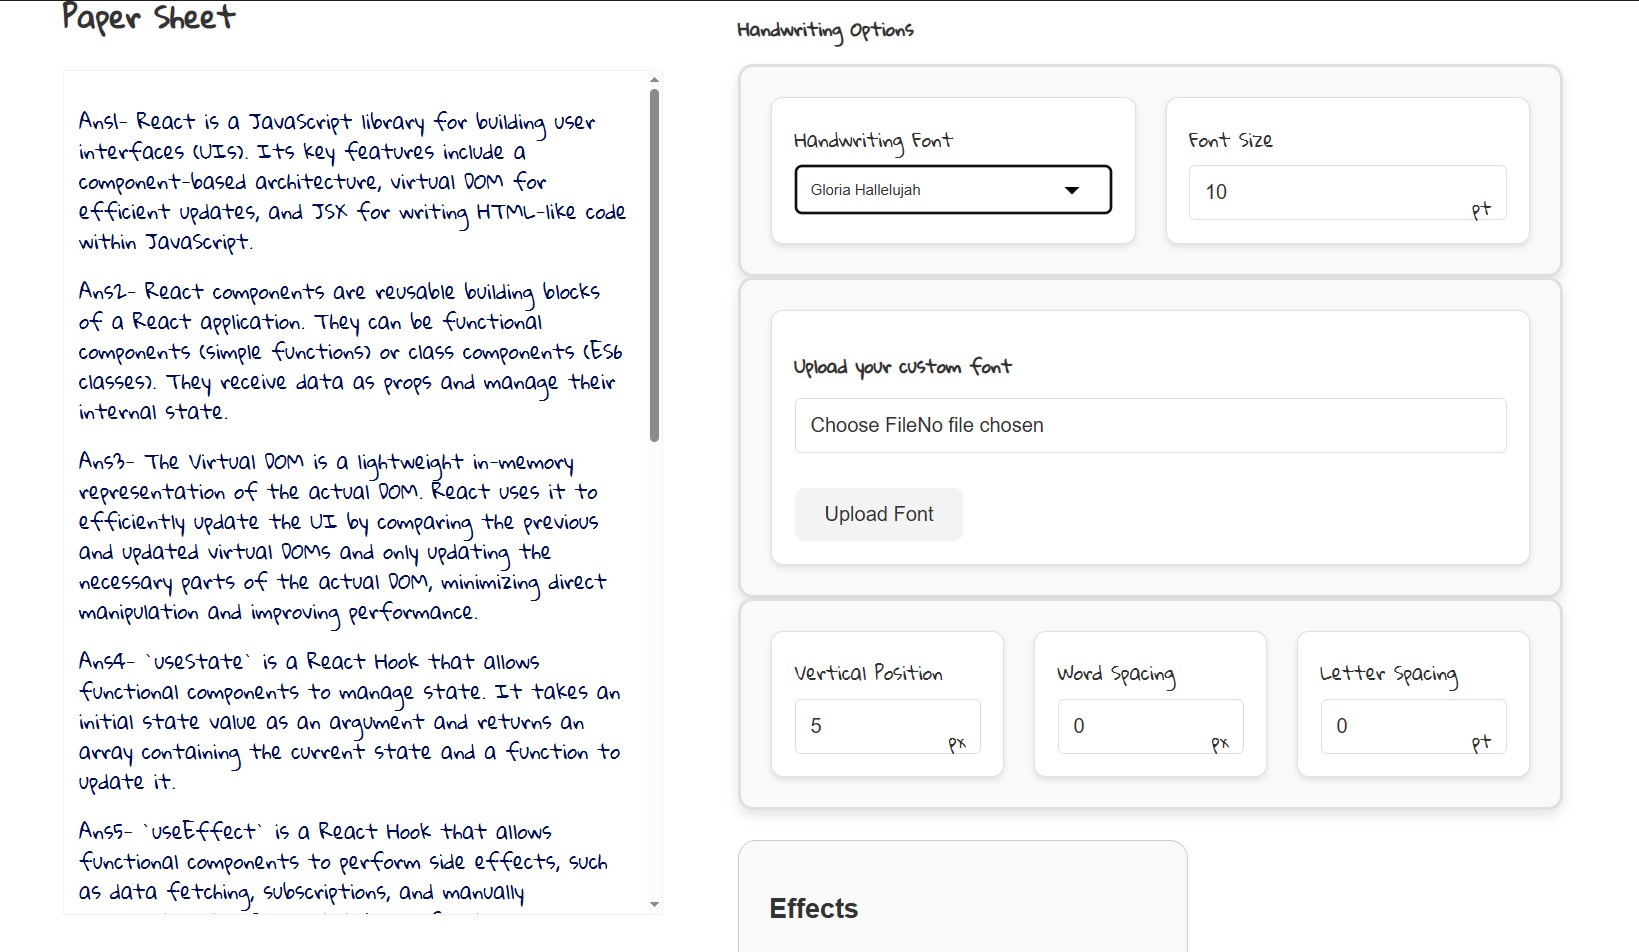
Handwriting customization panel with options

3. Generating Your Handwritten Document

Once you're satisfied with your customization settings:

  1. Review the content in the paper preview area.
  2. Make any necessary edits directly in the paper content area (it's editable!).
  3. If desired, upload a custom paper background image to personalize your document's appearance.
  4. Click the "Generate Sheet" button to create your handwritten document.
  5. The system will process your text and display the generated handwritten image below.

Tip: For longer assignments, the system will automatically create multiple pages. You can regenerate with different settings if you're not satisfied with the result.

Generate Sheet Button and Result

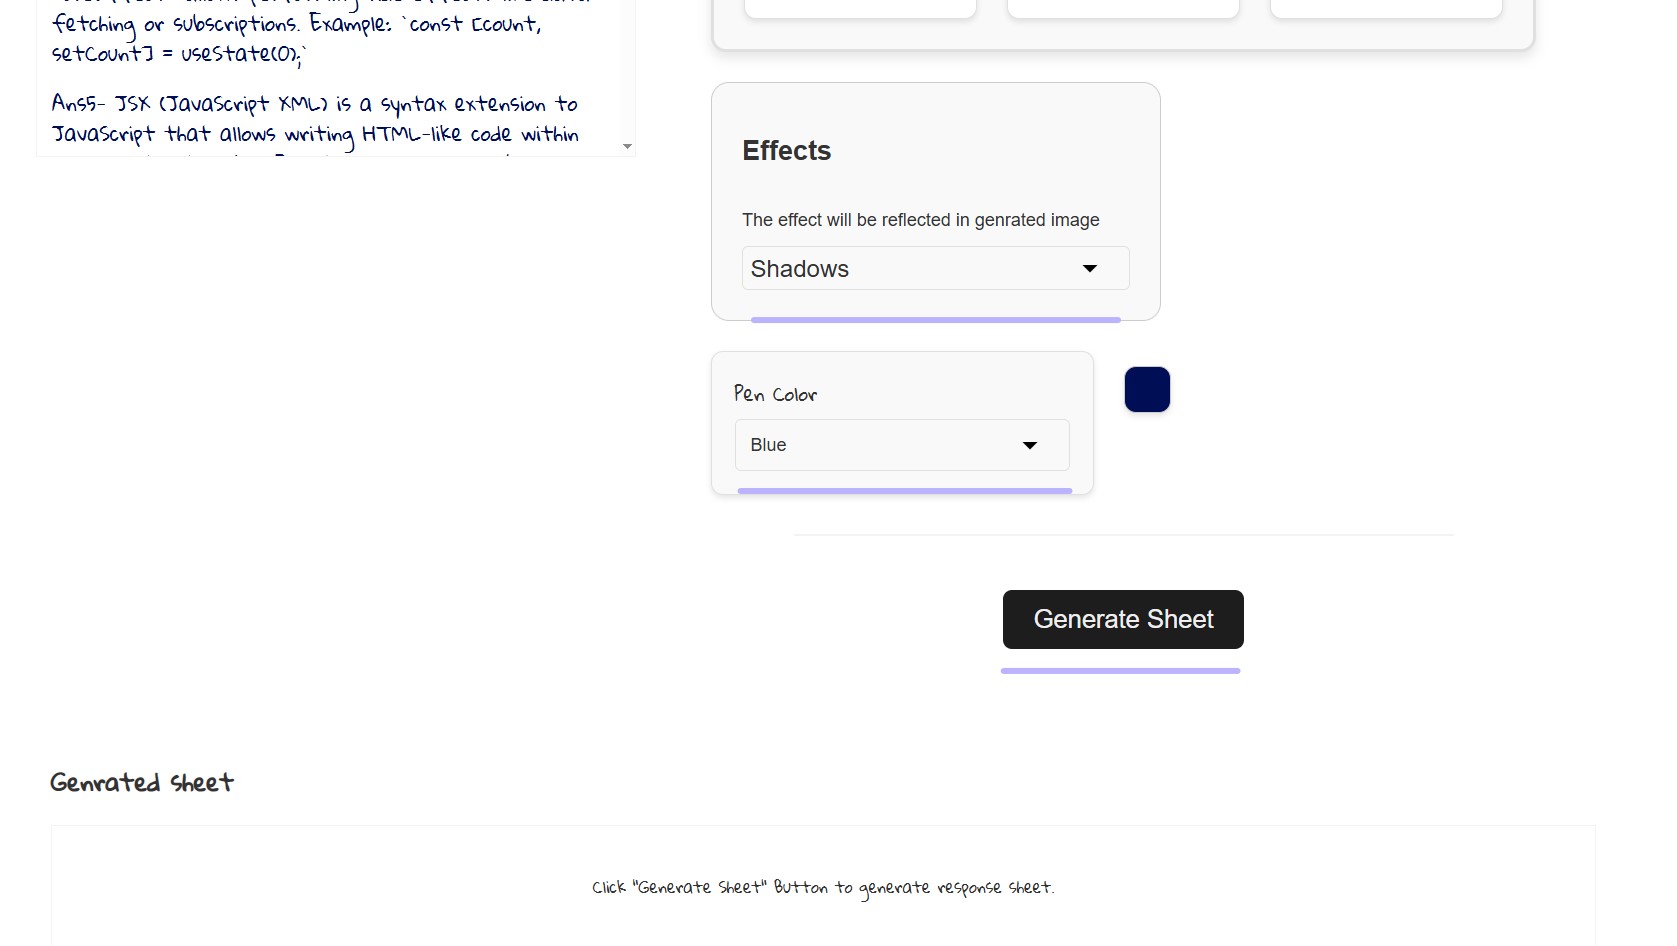
Generate button and resulting handwritten document

4. Downloading Your Handwritten Documents

After generating your handwritten documents, you have two download options:

  • Download All Images as PDF: Combines all generated pages into a single PDF document.
  • Individual Image Download: Click on any individual image to download it separately.
  • Clear All Images: Removes all generated images if you want to start over.

The downloaded files can be printed or submitted digitally as needed for your assignments.

Download Options

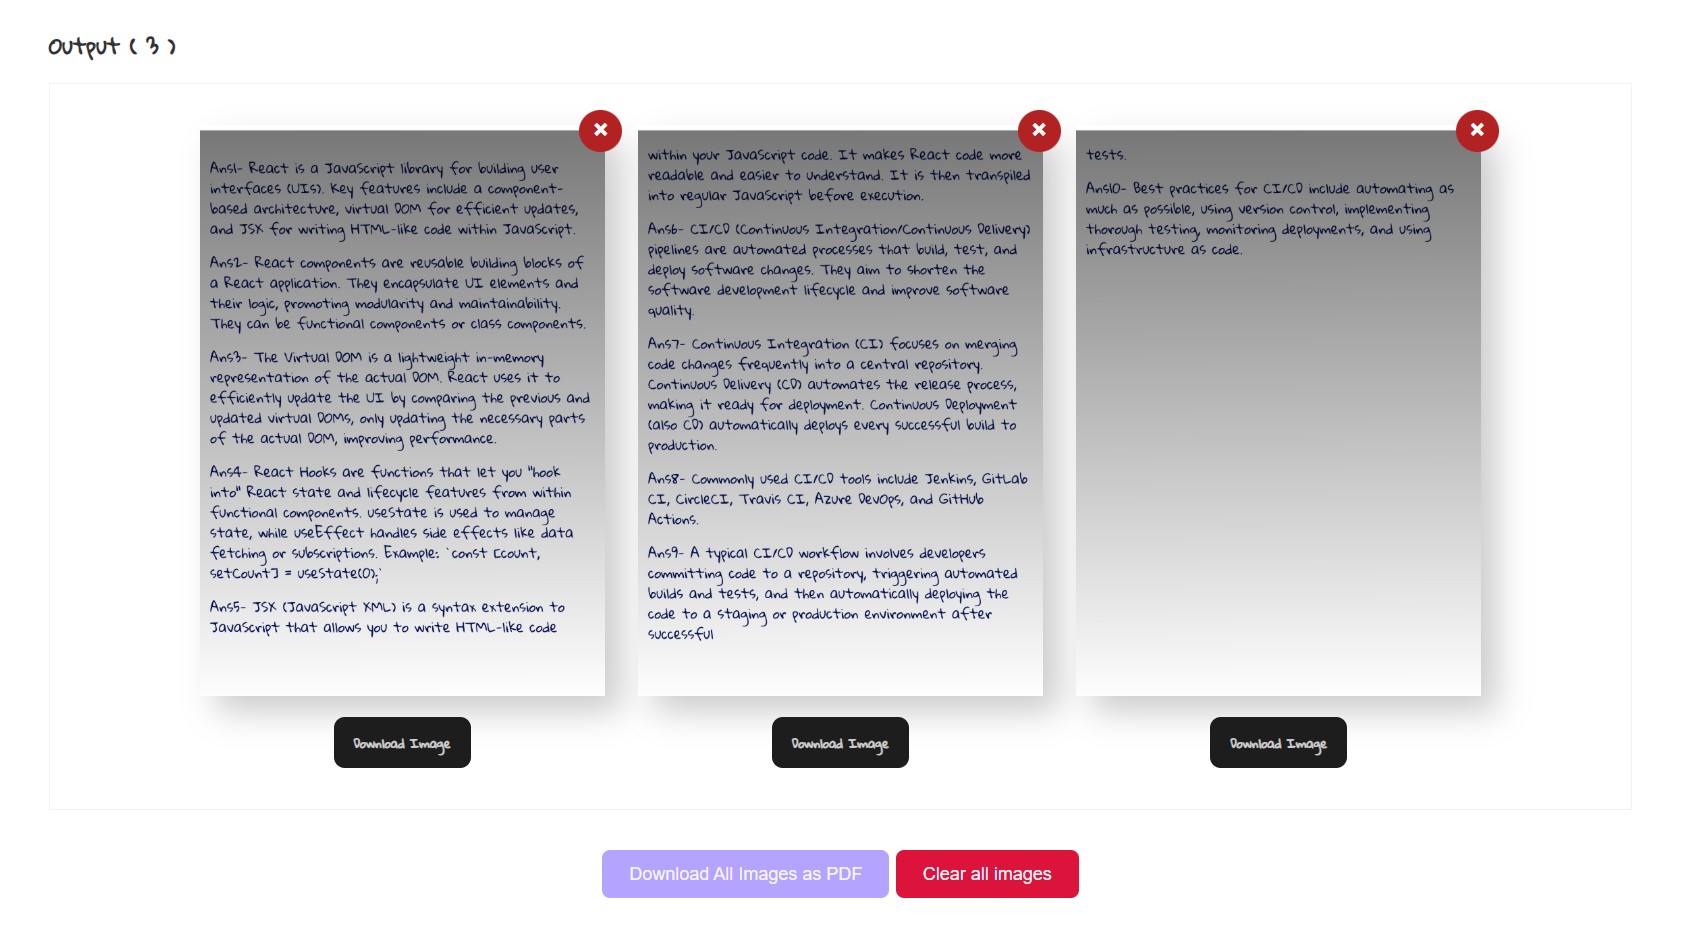
Download options for handwritten documents

Create Your Own Handwriting

1. Capturing Your Handwriting

To create your custom handwriting font:

  1. Navigate to the "Own Handwriting" section from the navigation menu.
  2. Choose between using your camera or uploading images of your handwriting samples.
  3. If using camera: Position your handwritten sample within the frame and capture.
  4. If uploading: Select clear images of your handwriting samples.
  5. Submit your samples to generate your custom font.
Handwriting Capture Interface

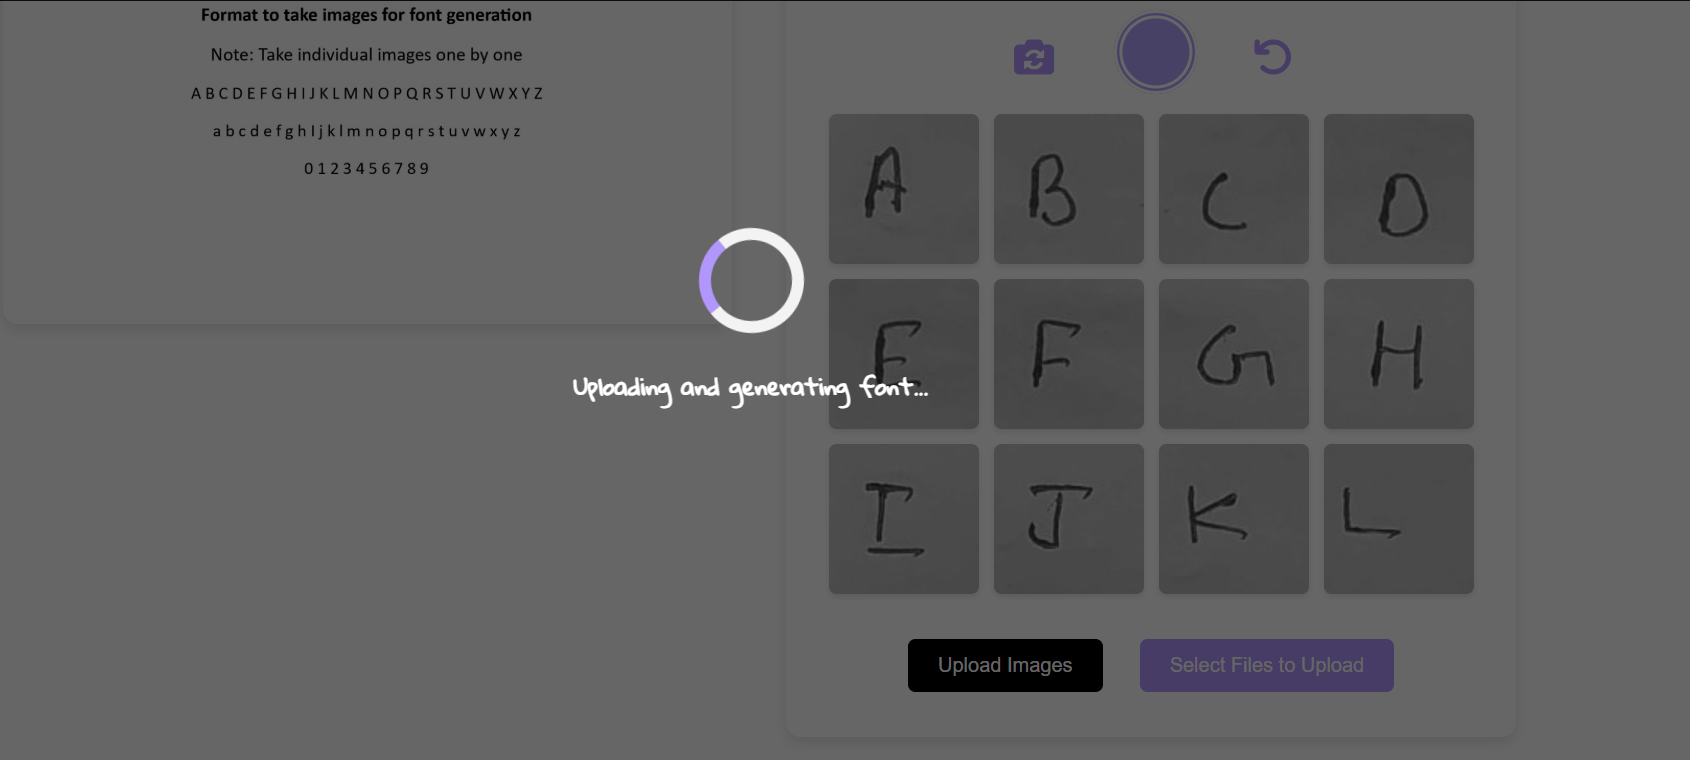
Handwriting capture & submission interface

2. Best Practices for Handwriting Samples

Do's:

  • Write within the designated boxes
  • Align your writing with the guidelines
  • Take clear, straight photos
  • Use a black pen on plain white paper
  • Write naturally as you normally would

Don'ts:

  • Don't write outside the guidelines
  • Avoid shadowy or poorly lit photos
  • Don't use light-colored pens
  • Avoid ruled or colored paper
Good Handwriting Sample

Good Example

Bad Handwriting Sample

Poor Example

3. Using Your Custom Handwriting Font

Once your custom font is generated:

  1. Return to the main page (Assignment to Handwriting section).
  2. In the Handwriting Options panel, find your custom font in the dropdown list.
  3. Select your font to apply it to your document.
  4. Adjust other settings as needed and generate your document.

Note: Custom fonts are stored in your browser. If you clear your browser data, you may need to recreate your font.

Using Custom Font in Options Panel

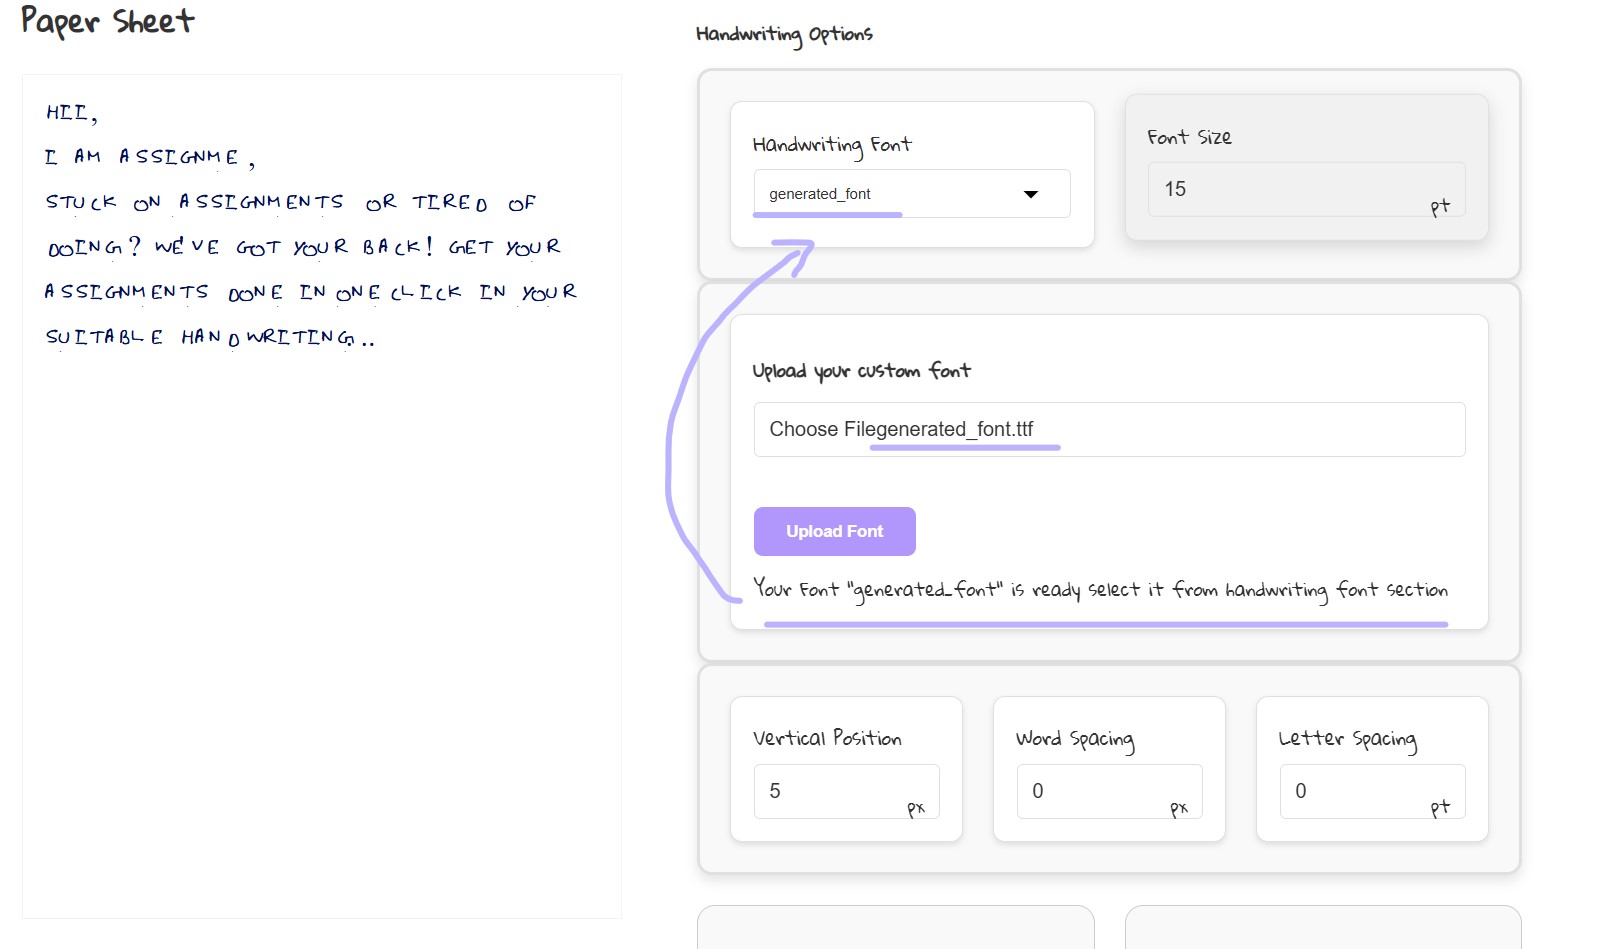
Using your custom font in the options panel

Additional Resources

Troubleshooting Common Issues

File Upload Errors

If you encounter issues uploading your file:

  • Ensure the file is in a supported format (PDF, JPG, PNG, JPEG)
  • Check that the file size is under 10MB
  • Try a different browser if the issue persists

Text Processing Issues

If your text isn't processed correctly:

  • Make sure the document is clear and legible
  • Try uploading a higher quality image/scan
  • You can always edit the text manually in the paper content area

Font Generation Problems

If your custom font isn't generating properly:

  • Ensure your handwriting samples follow the guidelines
  • Use better lighting when capturing samples
  • Make sure you're using a black pen on white paper

Frequently Asked Questions

Is my assignment data secure?

Yes, your assignment data is processed securely and is not stored permanently on our servers after processing.

Can I use this for any subject?

Yes! AssignMe works for any subject. Providing the subject name helps improve the processing accuracy.

How many pages can I generate?

There is no hard limit on pages, but very large documents may take longer to process.

Can I save my custom handwriting for later use?

Yes, custom fonts are saved in your browser's local storage for future use.

Is AssignMe free to use?

Yes, all features are currently available for free.

What kind of paper backgrounds can I use?

You can upload any image file (JPG, PNG) to use as paper background. Common choices include lined notebook paper, graph paper, or specialty stationery images.

Tips & Tricks

For the Most Realistic Results

  • Experiment with different font sizes (9-12pt often looks most realistic)
  • Add slight letter spacing (1-2pt) for a natural look
  • Upload a custom paper background image (like lined paper or textured stationery)
  • Use the Scanner effect for a more authentic appearance
  • Blue ink tends to look most like an actual pen on paper

For Faster Processing

  • Use clear, well-scanned documents
  • Break very large assignments into smaller sections
  • Process one page at a time for complex documents

For Custom Handwriting

  • Create multiple samples for more natural variation
  • Practice writing a sample first before capturing
  • Use a smooth-writing pen for clearest results